
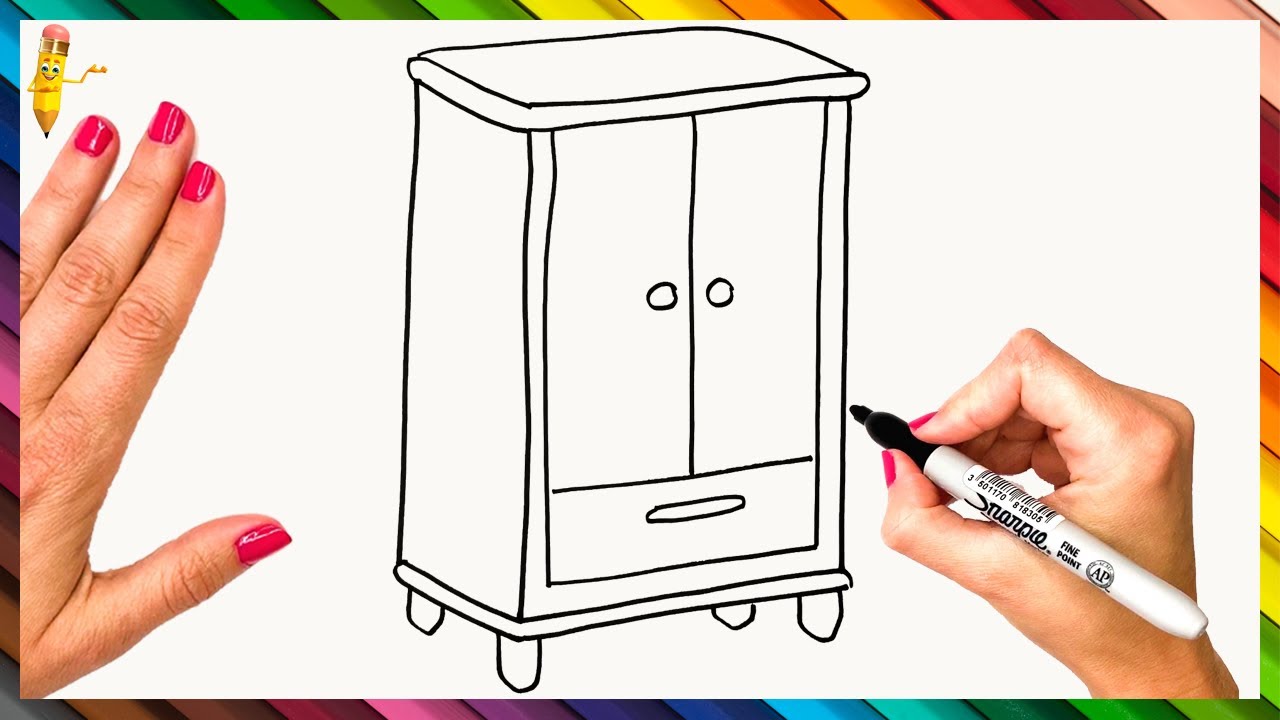
To draw a closet, start by sketching the basic outline using a ruler and pencil. Then, add details such as shelves, hanging rods, and doors.
Consider the dimensions and layout of the closet to ensure accuracy in your drawing. Creating a detailed drawing of a closet can help with planning and visualizing storage options. Whether you are a designer, DIY enthusiast, or homeowner, accurately representing the closet layout can aid in maximizing space and organization.
In this guide, you’ll find simple steps to draw a closet effectively, along with useful tips for adding depth and perspective to your sketch. Mastering these skills will not only enhance your design abilities but also make your project more professional and visually appealing.
Credit: m.youtube.com
1. Gathering Materials
1. Gathering Materials
1.1 Measuring Tape
Accurately measure your closet space.
1.2 Pencil
Use a sharpened pencil for precise outlines.
1.3 Paper
Have sheets of paper ready for sketching.

Credit: www.pinterest.com
2. Planning The Design
2. Planning the Design
When drawing a closet, it’s crucial to meticulously plan the design to ensure functionality and maximize space utilization.
2.1 Determine Closet Dimensions
- Measure the available space accurately
- Consider ceiling height and wall widths
- Ensure dimensions accommodate hanging rods and shelves
2.2 Consider Storage Needs
- Assess types of clothing and items to be stored
- Factor in the need for adjustable shelves or drawers
- Plan for shoe storage and accessories organization
2.3 Sketching The Design
- Draw a rough layout of the closet on graph paper
- Include measurements and placement of each component
- Consider ease of access and visual appeal in the design
3. Creating The Frame
Once you have finished measuring and planning the layout of your closet, it’s time to start creating the frame. This step is crucial as it will provide the structure and stability to your closet. In this section, we will guide you through the process of choosing the material, cutting the pieces, and assembling the frame.
3.1 Choosing The Material
The material you choose for your closet frame will determine its durability and strength. The most common materials used for closet frames are plywood and MDF (medium-density fiberboard). Both options have their pros and cons, so it’s important to consider your needs and budget.
Here are a few things to keep in mind when choosing the material:
- Strength: Ensure that the material you choose is strong enough to hold the weight of your clothes and other items you plan to store in the closet.
- Moisture resistance: If you live in a humid area or plan to store wet items in the closet, opt for a material that is moisture-resistant to prevent damage.
- Budget: Consider your budget and choose a material that fits within your financial constraints. Remember, higher quality materials tend to be more expensive.
3.2 Cutting The Pieces
Now that you have chosen the material for your closet frame, it’s time to cut the pieces to the desired dimensions. Measure the height, width, and depth of the closet frame, and mark those measurements on the material.
To ensure accuracy and neatness, you can use a circular saw or a table saw to cut the pieces. Remember to wear appropriate safety gear and follow the manufacturer’s instructions when operating the power tools.
3.3 Assembling The Frame
Once you have cut all the pieces, it’s time to assemble the frame. Lay out the pieces according to your measurements and start joining them together.
You can use screws or nails to secure the pieces. Make sure to countersink the screws or use wood filler to achieve a smooth finish.
During the assembly process, double-check the measurements to ensure that the frame is square and level. This will prevent any issues when installing the closet shelves and doors.
Once the frame is fully assembled, give it a final inspection to ensure that everything is aligned and secure. This step will provide a solid foundation for the rest of your closet installation.

Credit: www.craiyon.com
4. Building The Shelves
When it comes to building a closet, one of the crucial steps is creating and installing the shelves. The shelves are essential for organizing and storing items efficiently. In this section, we will discuss 4. Building the Shelves with a focus on selecting the material, measuring and cutting the shelves, and attaching them to the frame.
4.1 Selecting Shelf Material
When selecting shelf material, it’s important to consider both functionality and aesthetics. The material should be sturdy enough to hold the items you plan to store and complement the overall design of the closet. Wood, plywood, or melamine are popular choices for shelf materials due to their durability and versatility. Consider the weight of the items to be stored and the design of the closet when choosing the material.
4.2 Measuring And Cutting Shelves
Measuring and cutting the shelves accurately is crucial for ensuring a proper fit within the closet. Use a measuring tape to determine the dimensions of the closet space for the shelves. Once the measurements are taken, carefully mark the shelf material and use a saw or appropriate cutting tool to cut the shelves to the required size. Precision is key to achieving a seamless fit.
4.3 Attaching Shelves To The Frame
Attaching shelves to the frame involves securing the shelves within the closet structure. Utilize wood screws, brackets, or shelf pins to affix the shelves to the closet frame. Ensure each shelf is level and securely anchored to provide stability and support for the items to be stored. Consider the weight capacity of the shelves and distribute weight evenly to prevent sagging or damage.
5. Adding Doors
When it comes to adding doors to your closet, it’s important to consider the style, measurements, and installation process to ensure a functional and aesthetically pleasing result.
5.1 Choosing Door Style
Before diving into the installation process, choose a door style that complements the overall design of your closet. Whether it’s sliding, bifold, or traditional hinged doors, consider the space available, accessibility, and personal preference when making your selection.
5.2 Measuring And Cutting Doors
Accurate measurements are crucial for a seamless door installation. Measure the height and width of the door frame, taking into account any flooring or carpet that may affect clearance. Once measured, use a saw to carefully cut the doors to the appropriate size, ensuring precision to avoid fitting issues.
5.3 Installing Door Hinges
Properly installed door hinges are essential for smooth functionality. Position the hinges on the door frame and align them with the corresponding marks on the door. Secure the hinges in place with screws, ensuring they are flush and level for a secure attachment. With the hinges in place, test the swinging motion of the door to confirm smooth operation.
6. Installing Hardware
6. Installing Hardware
Once you have completed building your closet, it’s time to install the hardware. This step is crucial as it adds the finishing touches and ensures that your closet is not only functional but also aesthetically pleasing. There are several aspects to consider when installing hardware, such as choosing knobs or handles, measuring and marking hardware placement, and attaching the hardware securely. Let’s delve into each of these steps to help you achieve the perfect closet.
6.1 Choosing Knobs Or Handles
When it comes to selecting knobs or handles for your closet, you have various options to choose from. Take into consideration the overall style and theme of your closet. Do you want a modern, sleek look or a more traditional and ornate design? Knobs are typically smaller and easier to grasp, while handles provide a larger gripping surface. Consider the practicality and visual appeal of each option.
6.2 Measuring And Marking Hardware Placement
Precision is key when installing hardware, so before drilling any holes, ensure you measure and mark the placement accurately. To determine the optimal position of knobs or handles, keep functionality in mind. Measure the height and width of the closet doors, taking note of any other elements that could affect hardware placement, such as shelves or framing. Use a measuring tape and a pencil to mark the desired locations.
6.3 Attaching Hardware
Once you have selected the perfect knobs or handles and marked their placement, it’s time to attach the hardware. Ensure that you have the necessary tools, such as a drill and screwdriver, to secure the hardware firmly. If the hardware requires screws, pre-drill pilot holes to prevent splintering or damage to the closet door. Position the hardware on the marked spots and use a screwdriver or drill to attach them securely.
By following these steps, you can easily install hardware on your closet doors, giving your closet the perfect finishing touch. Remember to choose hardware that complements the style of your closet and install it with precision. Enjoy the satisfaction of a well-designed and organized closet!
7. Painting Or Staining
7. Painting or Staining
7.1 Preparing The Surfaces
- Clean the closet surfaces to remove dust and debris.
- Sand the surfaces lightly to ensure the paint adheres well.
- Fill any holes or cracks with wood filler and sand smooth.
7.2 Applying Primer
- Use a quality primer to create a smooth base for paint.
- Apply the primer evenly with a brush or roller.
- Allow the primer to dry completely before painting.
7.3 Painting Or Staining The Closet
Choose your preferred paint color or wood stain for the closet.
Apply the paint or stain in thin, even coats for best results.
Allow each coat to dry before applying the next layer.
Remember to cover nearby areas with a drop cloth before painting or staining to protect them from drips and spills. Use high-quality brushes and applicators for a professional finish.8. Organizing And Styling
8. Organizing and Styling
When it’s time to organize and style your closet, it’s essential to have a clear plan in place. Let’s break it down into three key steps:
8.1 Sorting And Categorizing Items
Create clear categories for your clothes like tops, bottoms, and accessories. Use labels or tags to identify each category.
8.2 Maximizing Storage Space
- Utilize hanging organizers for shoes, scarves, and belts to save space.
- Consider installing shelves or drawers to store folded items neatly.
8.3 Adding Personal Touches
- Add decorative bins or baskets for a stylish touch.
- Showcase your favorite items by displaying them prominently.
Frequently Asked Questions On How To Draw A Closet
How Can I Measure The Space For A Closet?
To measure the space for a closet, start by measuring the width, height, and depth of the area. Consider any obstructions or obstacles that may affect installation. Keep in mind the type of closet you want to install, such as a walk-in or reach-in closet, to ensure accurate measurements.
What Tools And Materials Are Needed To Build A Closet?
To build a closet, you’ll need basic carpentry tools such as a tape measure, saw, drill, and level. Additionally, materials like plywood, closet rods, shelves, and brackets will be necessary. Depending on the design, you may also require paint, trim, and decorative hardware for a polished finish.
How Do I Design An Efficient Closet Layout?
Designing an efficient closet layout involves assessing your storage needs and the available space. Consider incorporating shelving, drawers, and hanging rods to accommodate different types of clothing and accessories. Utilize vertical space and creative storage solutions to maximize functionality and organization within the closet.
What Are The Best Practices For Organizing A Closet?
Organizing a closet effectively involves categorizing items, utilizing space-saving hangers, and incorporating storage bins or baskets. Implement a system for arranging clothing by type or color to streamline the selection process. Regularly declutter the closet to maintain an organized and tidy space.
Conclusion
To wrap up, drawing a closet doesn’t have to be a daunting task. By following the step-by-step instructions outlined in this blog post, you can easily create your own custom closet design. Remember to use proper measurements and be patient with your sketches.
Whether you’re an aspiring artist or just looking to enhance your home’s interior, mastering this skill will undoubtedly come in handy. So, pick up your pencil and start drawing your dream closet today!
{ “@context”: “https://schema.org”, “@type”: “FAQPage”, “mainEntity”: [ { “@type”: “Question”, “name”: “How can I measure the space for a closet?”, “acceptedAnswer”: { “@type”: “Answer”, “text”: “To measure the space for a closet, start by measuring the width, height, and depth of the area. Consider any obstructions or obstacles that may affect installation. Keep in mind the type of closet you want to install, such as a walk-in or reach-in closet, to ensure accurate measurements.” } } , { “@type”: “Question”, “name”: “What tools and materials are needed to build a closet?”, “acceptedAnswer”: { “@type”: “Answer”, “text”: “To build a closet, you’ll need basic carpentry tools such as a tape measure, saw, drill, and level. Additionally, materials like plywood, closet rods, shelves, and brackets will be necessary. Depending on the design, you may also require paint, trim, and decorative hardware for a polished finish.” } } , { “@type”: “Question”, “name”: “How do I design an efficient closet layout?”, “acceptedAnswer”: { “@type”: “Answer”, “text”: “Designing an efficient closet layout involves assessing your storage needs and the available space. Consider incorporating shelving, drawers, and hanging rods to accommodate different types of clothing and accessories. Utilize vertical space and creative storage solutions to maximize functionality and organization within the closet.” } } , { “@type”: “Question”, “name”: “What are the best practices for organizing a closet?”, “acceptedAnswer”: { “@type”: “Answer”, “text”: “Organizing a closet effectively involves categorizing items, utilizing space-saving hangers, and incorporating storage bins or baskets. Implement a system for arranging clothing by type or color to streamline the selection process. Regularly declutter the closet to maintain an organized and tidy space.” } } ] }