
To put in a corner shelf, measure and mark the spot. Install brackets, then place and secure the shelf.
Corner shelves are a great way to utilize underutilized space in your home while adding functionality and style. Whether for displaying decor, storing essentials, or organizing items, corner shelves can enhance the aesthetic and functionality of any room. By following a few simple steps, you can easily install a corner shelf to maximize storage and enhance the overall look of your space.
In this guide, we will provide you with step-by-step instructions on how to efficiently and effectively put in a corner shelf in your home. Let’s get started on transforming your corner space into a stylish and practical storage solution.
Choosing The Right Corner Shelf
When it comes to adding storage and style to your room, a corner shelf is an excellent choice. Not only does it make use of often neglected spaces, but it also adds a decorative element to your room. However, with so many options available, it can be overwhelming to choose the right corner shelf. In this section, we will discuss important factors to consider when selecting the perfect corner shelf for your space.
Consider The Available Space
Before you start shopping for a corner shelf, it’s crucial to assess the available space in your room. Measure the corner where you plan to install the shelf. Take note of the height, width, and depth of the corner to ensure the shelf fits perfectly.
Next, consider the placement of the shelf in relation to other furniture or objects in the room. Will the shelf be adjacent to a sofa, a bed, or other shelves? Take these factors into account to determine the size and design of the corner shelf that will best complement the existing elements in your room.
Selecting The Appropriate Material
When it comes to corner shelves, the material choice plays a significant role in both aesthetics and durability. Here are some popular options:
| Material | Pros | Cons |
|---|---|---|
| Wood | Classic look, versatile, natural appeal | Can be prone to scratches or water damage if not properly sealed |
| Glass | Sleek and modern, reflects light, visually lightens the space | Requires frequent cleaning to maintain a pristine appearance |
| Metal | Sturdy, contemporary look, easy to clean and maintain | Metal shelves may limit style options |
| Plastic | Affordable, lightweight, available in various colors | May not offer the same durability as other materials |
Consider the overall theme and vibe of your room when selecting the material. If you have a rustic or traditional room, a wooden corner shelf can be a charming addition. Alternatively, if your room has a modern aesthetic, a sleek glass or metal shelf may be the perfect fit.
Remember to also consider your own maintenance preferences. Some materials require more upkeep than others, so choose accordingly based on your lifestyle and willingness to clean or maintain the shelf.
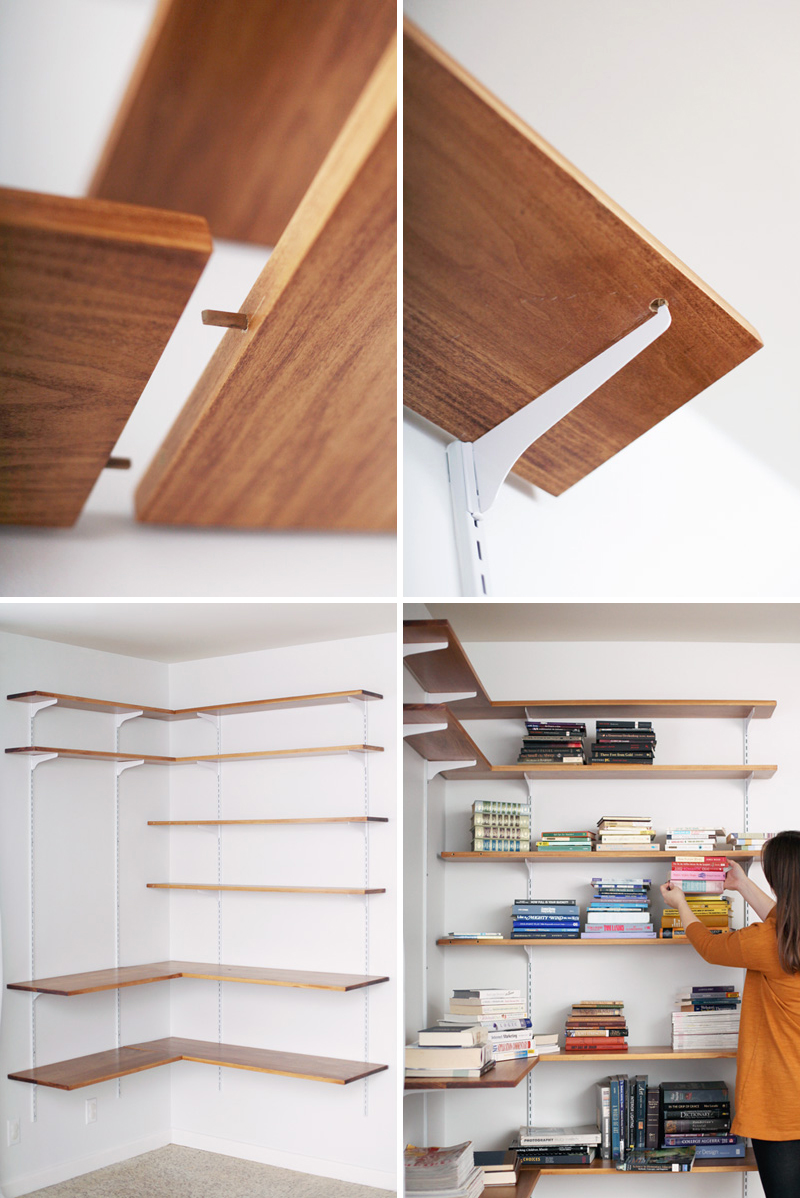
Credit: abeautifulmess.com
Preparing The Corner Area
Measuring The Space
Using a tape measure, determine the dimensions of the corner where you plan to install the shelf.
Create a sketch noting the width, height, and depth of the corner for precise measurements.
Ensuring Proper Support
Identify the wall material and locate the wall studs using a stud finder for sturdy support.
- Consider adding brackets or anchors for additional support, especially for heavy shelves.
Gathering Necessary Tools And Materials
To successfully put in a corner shelf, gather all the necessary tools and materials before starting. Having everything ready will help streamline the installation process and ensure a smooth outcome.
Essential Tools
Before starting, gather essential tools such as a stud finder, level, measuring tape, electric drill, and mounting brackets.
Required Materials
For installing a corner shelf, you will need required materials like the shelf unit, screws, anchors, and a pencil for marking.
Installing The Corner Shelf
Learn how to seamlessly install a corner shelf in your space with our easy-to-follow step-by-step guide. Enhance your room’s functionality and aesthetic appeal by incorporating this practical storage solution into your home design.
Putting in a corner shelf is a great way to maximize storage space and add a stylish touch to any room. Whether you’re a DIY enthusiast or just looking to tackle a small home improvement project, installing a corner shelf can be a straightforward task. In this post, we’ll guide you through the process, step by step, to ensure your corner shelf is securely mounted and perfectly level. Let’s get started!
Marking The Mounting Points
To begin, you’ll need to determine the ideal location for your corner shelf. Take into consideration the purpose of the shelf and the items you plan to display or store on it. Once you have chosen the corner, grab a pencil and a tape measure to mark the mounting points.
Here’s how to do it:
1. Measure the length and width of your shelf. This will help determine the exact placement and alignment.
2. Use a spirit level to ensure the surface is perfectly vertical and then make a small mark at the desired height for the bottom of the shelf.
3. With the help of a second person or a shelf bracket, hold the shelf in place against the wall at the marked height. Make sure it’s centered in the corner and adjust as needed.
4. Hold the shelf bracket against the wall, aligning it with the bottom of the shelf. Mark the screw holes on the wall using a pencil.
5. Repeat the process for any additional brackets, making sure they are evenly spaced and level with each other.
Proper Placement And Leveling
Now that you’ve marked the mounting points, it’s time to move on to the next step: proper placement and leveling of your corner shelf. Ensuring a level surface is crucial for both the aesthetic appeal and functionality of your shelf.
Follow these steps to achieve a leveled shelf:
1. Prepare the wall for mounting by drilling small pilot holes on the marked spots. Use a drill bit that matches the size of your screws.
2. Attach the brackets to the wall using the screws provided. Make sure they are securely fastened to support the weight of the shelf.
3. Carefully place the shelf on top of the brackets, double-checking that it sits flush and level. Adjust the brackets if necessary.
4. Use a spirit level to confirm that the shelf is perfectly horizontal. Make any adjustments by slightly tilting the shelving unit or repositioning the brackets.
5. Once the shelf is level, ensure that all brackets are firmly tightened and the shelf is securely attached to the wall.
Congratulations! You have successfully installed your corner shelf. Now it’s time to decorate and organize your items on the newly installed shelf to showcase your unique style and personality. By carefully following these steps, you can effortlessly enhance your living space with a functional and visually appealing corner shelf.
Securing The Shelf
Securing the shelf is a crucial step in installing a corner shelf. Properly securing the shelf not only ensures the safety and stability of the shelf but also enhances its longevity. By following the correct methods for securing the shelf, you can enjoy a functional and aesthetically pleasing addition to your space.
Using Appropriate Hardware
When securing the corner shelf, it is essential to use appropriate hardware that is suitable for the type of wall and the weight the shelf will bear. For drywall, utilize anchors that can support the shelf’s weight. If mounting on a stud, select sturdy screws that are long enough to penetrate the stud and provide a secure anchor. It is advisable to consult with the hardware store or a professional for guidance on choosing the right hardware for your specific installation.
Checking Stability
After securing the shelf, it is crucial to check stability by applying gentle pressure and ensuring that the shelf is firmly anchored to the wall. An unstable shelf can be a safety hazard and can also lead to damage of items displayed on it. Performing a thorough check for stability ensures that the shelf is securely installed and ready for use.
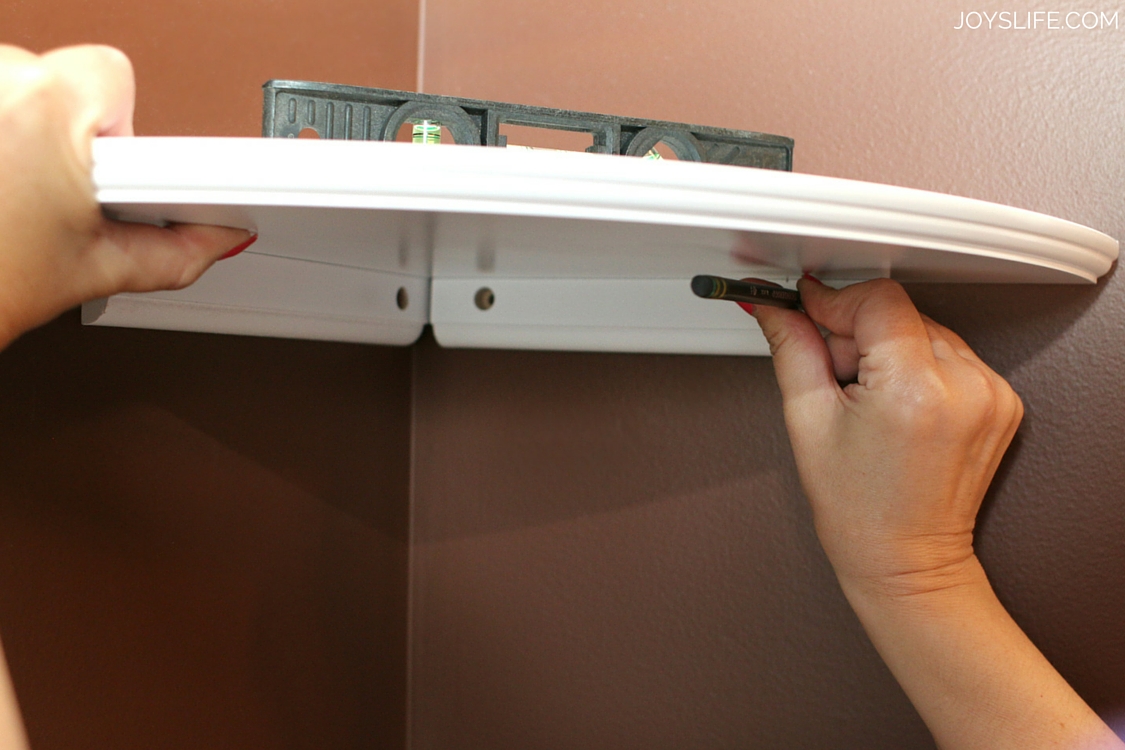
Credit: joyslife.com
Adding Finishing Touches
Once your corner shelf is securely in place and functional, it’s time to focus on adding the finishing touches. This step is crucial for not only enhancing the aesthetic appeal of the shelf but also making it practical for everyday use. Let’s explore the final steps to complete your corner shelf installation.
Decorating The Shelf
Decorating your corner shelf allows you to infuse personality into the space. Consider the overall theme of the room and select decorative items that complement it. This could be anything from artwork, vases, or sculptures to natural elements such as potted plants or woven baskets. Create visual interest by using a variety of shapes, textures, and colors, ensuring that the items placed on the shelf harmonize with the room’s decor.
Organizing Items
Allocating specific functions to each section of your corner shelf is essential for effective organization. Group items based on their use or purpose, making it easier to locate things when needed. Utilize baskets, bins, or small containers to keep smaller items neatly arranged. Labeling these containers can further enhance organization and prevent clutter. Remember to prioritize the most frequently accessed items by placing them within easy reach.
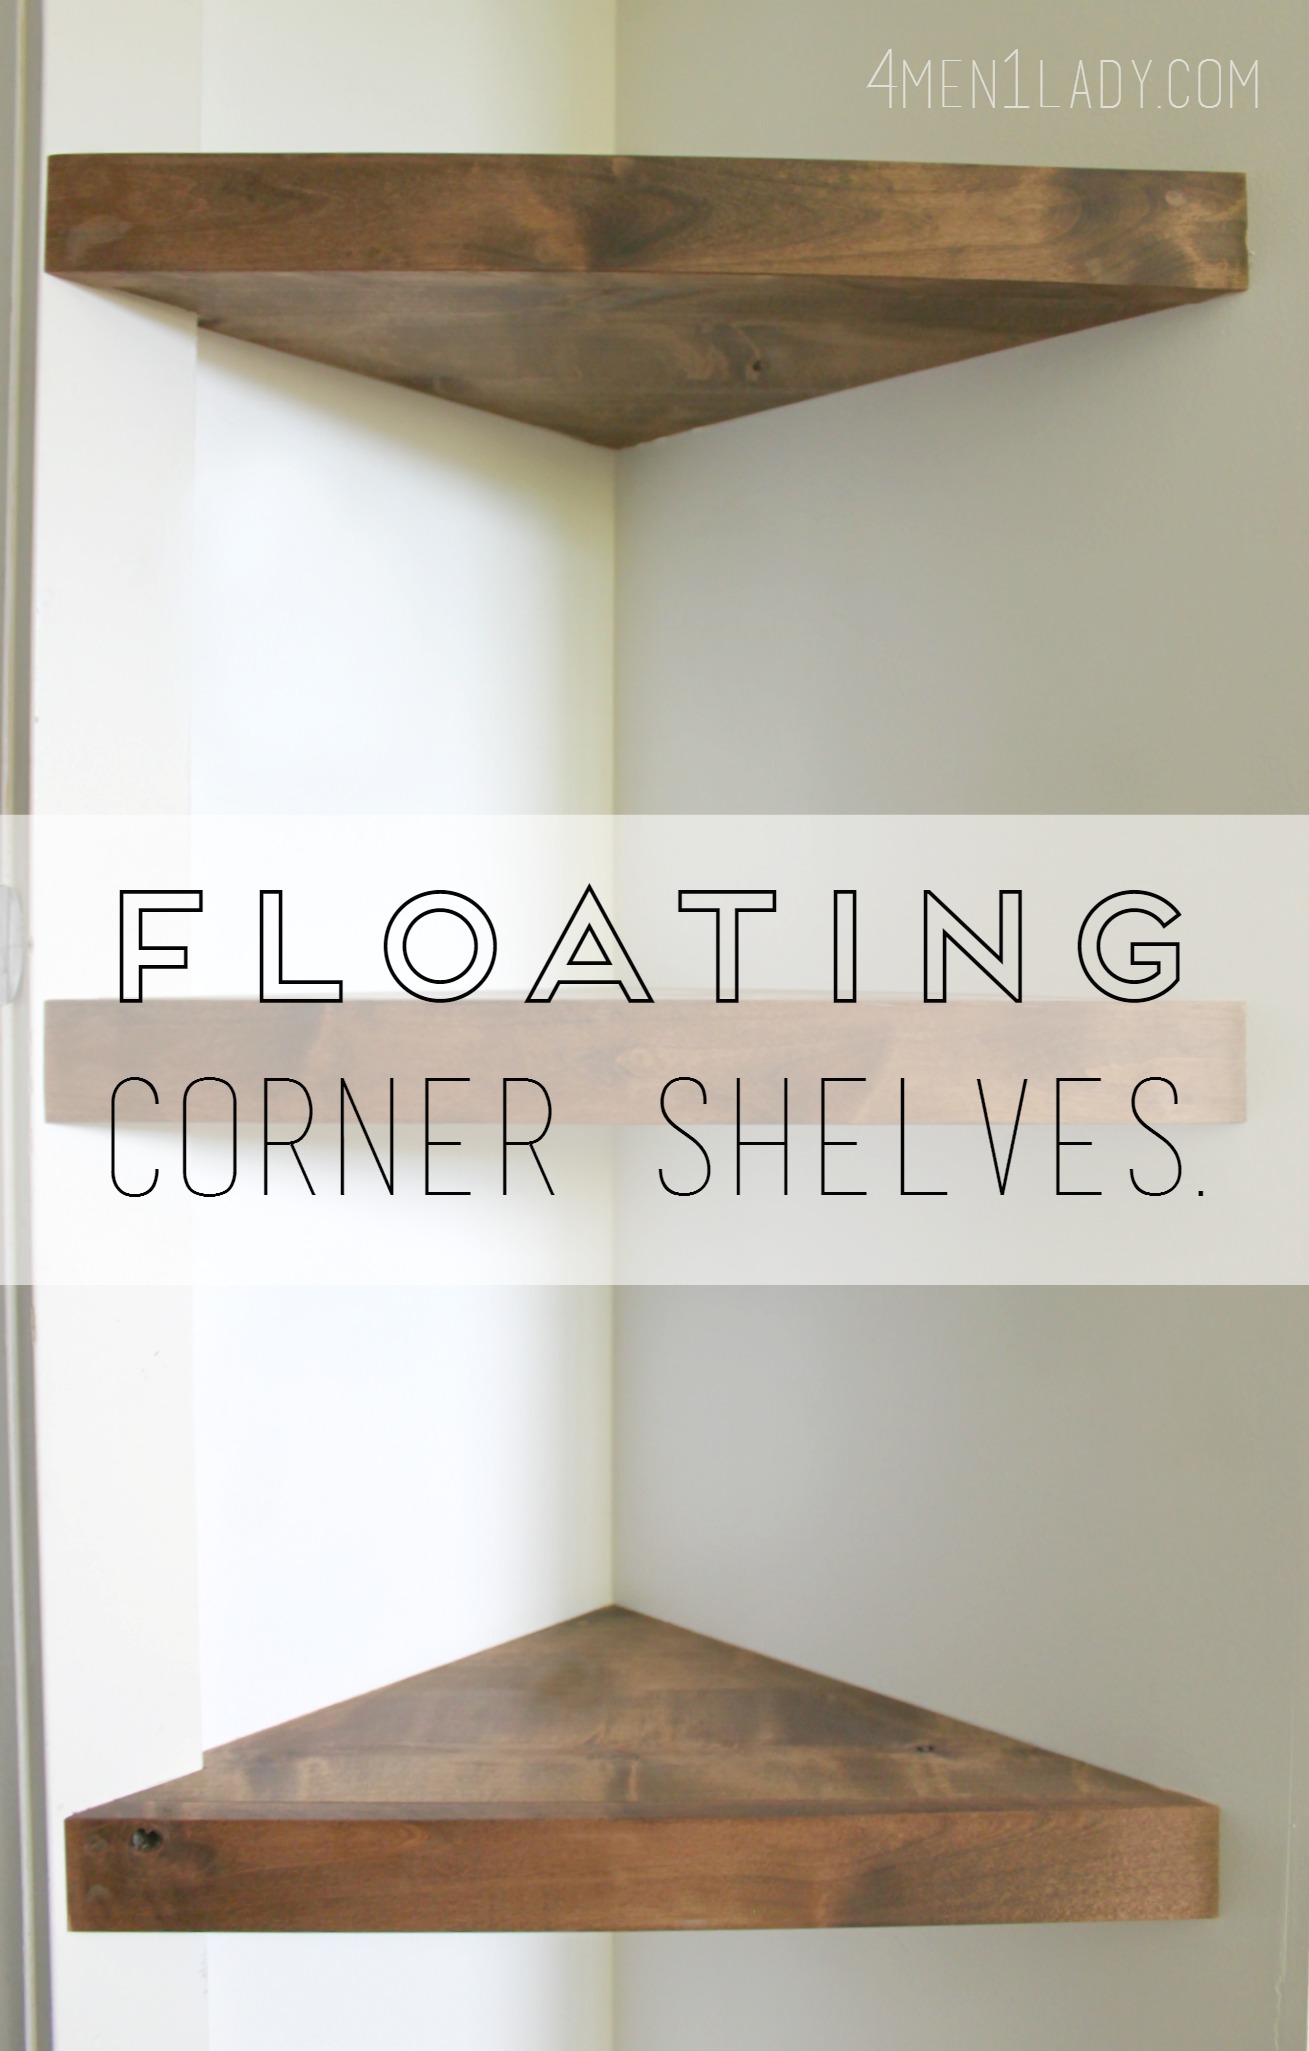
Credit: 4men1lady.com
Frequently Asked Questions For How To Put In A Corner Shelf
How Do I Measure For A Corner Shelf?
To measure for a corner shelf, use a tape measure to determine the height, width, and depth of the corner. Take note of any obstacles or obstructions. Consider the weight the shelf will bear to determine the appropriate support system.
What Are The Best Materials For A Corner Shelf?
When selecting materials for a corner shelf, consider options like wood, glass, or metal. Each material offers different aesthetic and functional benefits. Wood provides a natural, warm look, while metal offers a sleek, modern appearance. Glass can create an illusion of space and adds a touch of elegance.
How Do I Install A Corner Shelf Without Drilling?
To install a corner shelf without drilling, consider adhesive or tension-mounted options. Adhesive shelves can be easily attached to smooth surfaces, while tension-mounted shelves use pressure to remain in place. Before installation, ensure the surface is clean and dry to maximize adhesion or pressure.
Conclusion
Putting in a corner shelf is a simple and effective way to add storage and style to your space. With the right tools and steps, you can easily complete this DIY project. Remember to choose a suitable corner, measure accurately, and install the shelf securely.
By following these guidelines, you can create a functional and attractive corner shelf that enhances your home decor. Happy shelf-building!